
From Screen Recording to User Guides in 15 Minutes: A Step-by-Step Workflow
The fastest way to create documentation isn’t writing. Discover a faster, AI-powered workflow to create SOPs, manuals, and training docs in minutes.
TL;DR
Writing user guides manually is slow, repetitive, and hard to scale. Most teams spend more time documenting than doing.
The fix isn’t writing faster. It’s switching to a capture-first workflow: record once, auto-generate steps, screenshots, and structured guides.
AI-powered tools make documentation faster, consistent, and actually maintainable.
Writing user guides from scratch is still painfully slow. Docs, screenshots, formatting, revisions - it all adds up. And by the time you're done, the process has already changed.
Capturing the workflow is easy. You can record your screen in minutes. Walk through a workflow. Explain it as you go. Done. But turning that raw screen recording into a structured user guide, user manual, or SOP?
That’s where everything slows down. You’re stuck manually translating actions into steps, rebuilding context, recreating visuals, formatting documentation for different use cases like training docs, onboarding guides, internal SOPs.
That gap between doing and documenting is the real bottleneck in documentation workflows, but it doesn’t have to be. And we’ll show you how.
Why Generating User Guides Matters (More Than You Think)
User guides are operational infrastructure. Every time someone asks, “How do I do this?”, it’s a signal: your documentation isn’t doing its job. Strong user guide creation and user manual creation directly impact:
Faster onboarding → new hires ramp without constant hand-holding
Better SOP creation → processes stay consistent across teams
Scalable training documentation → knowledge doesn’t live in people’s heads
Customer education → users solve problems without raising tickets
The business impact shows up in fewer support queries, less dependency on experts, and faster execution across teams. On the flip side, poor documentation slows everything down with repeated questions, inconsistent workflows, and wasted time recreating knowledge.
Get Started with Clueso
Start turning workflows into user guides instantly.
The Shift: Moving From Manual Documentation To Automated Documentation Workflows
Traditional user guide creation looks something like this:
Write → take screenshots → format → revise → update again later
It’s linear, manual, and painfully time consuming. Every step requires context switching and every update means starting over. But teams can now shift to a different model for user manual creation:
Capture → Extract → Generate → Refine → Publish
Instead of writing from scratch, you can use Clueso to:
Capture the process with a screen recording
Extract steps and context automatically
Generate a structured user guide or user manual
Refine where needed
Publish instantly
Your screen recording becomes the source of truth, powering everything from SOP creation to training documentation. It’s faster, more accurate, and far easier to maintain.
Get Started with Clueso
Start turning workflows into user guides instantly.
Step-by-Step Workflow: From Screen Recording to User Guide
This is a repeatable documentation workflow you can use for SOP creation. Lets get started with how to create user manuals:
Step 1: Capture Your Process
Instead of starting with a blank doc and figuring out how to explain the workflow manually, start by recording your screen on Clueso. Walk through the process exactly as you would in real life - click through the product, complete the task in the right order, and narrate naturally as you go.
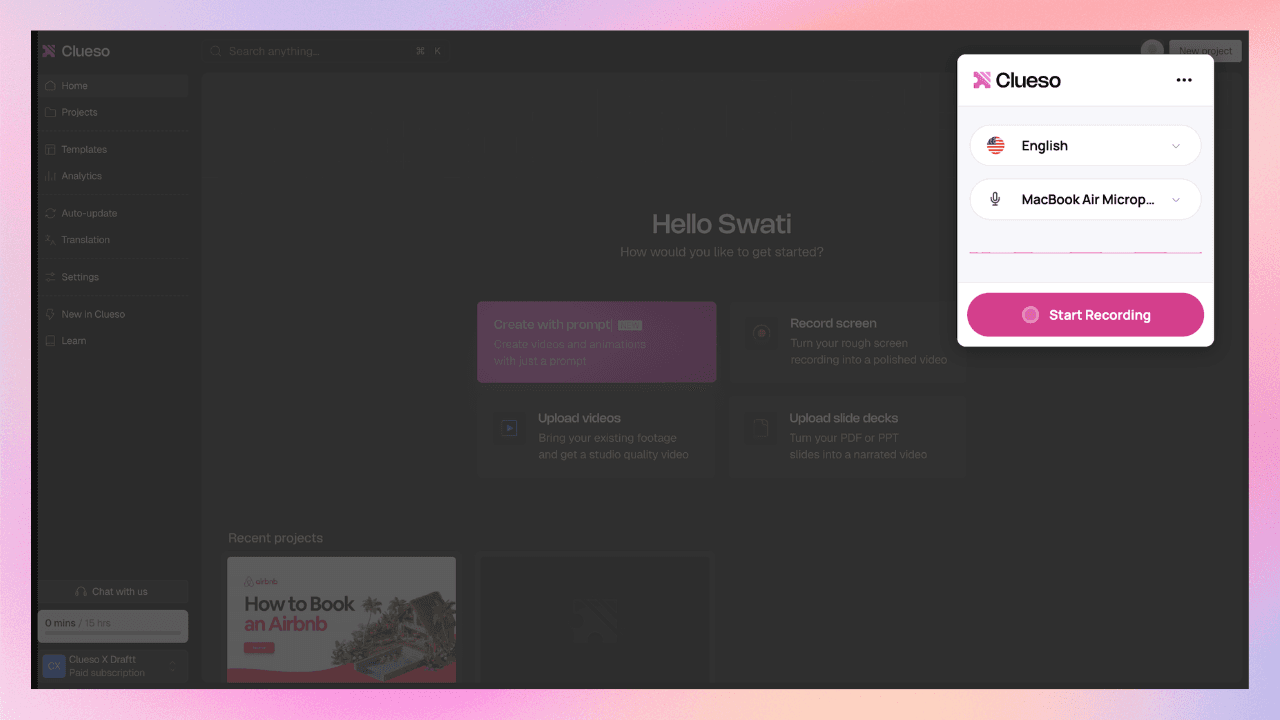
Clueso automatically captures the source material for your guide, including:
your clicks and navigation flow
the sequence of actions
the screens that matter
Instead of reconstructing the process from memory, you’re documenting from the source of truth. That’s what makes this step powerful.
💡 Pro Tip: Don’t over-script this stage. The clearer your flow, the better Clueso can turn it into steps and written instructions later.
Step 2: Auto-Extract Steps from the Recording
Once your recording is complete, Clueso automatically turns your workflow into a structured, step-by-step guide.
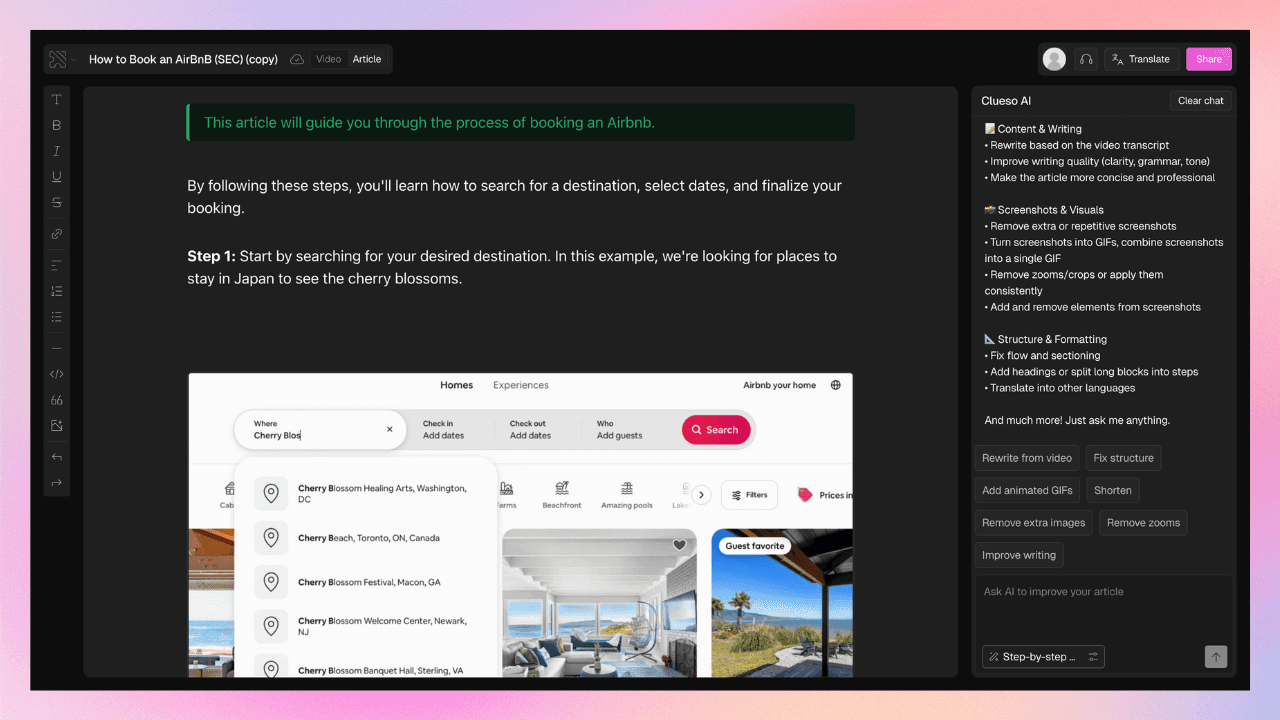
This is powered by Clueso’s process capture and step detection, which identifies meaningful actions in your recording and converts them into individual steps. Every click, navigation, or interaction is recognized and arranged in the correct order.
So instead of manually figuring out where each step begins, what to include or exclude, or how to structure the flow, Clueso gives you a ready-made outline of your user guide. What’s usually the hardest part of documentation, going from a blank page to an organized flow, is already done for you.
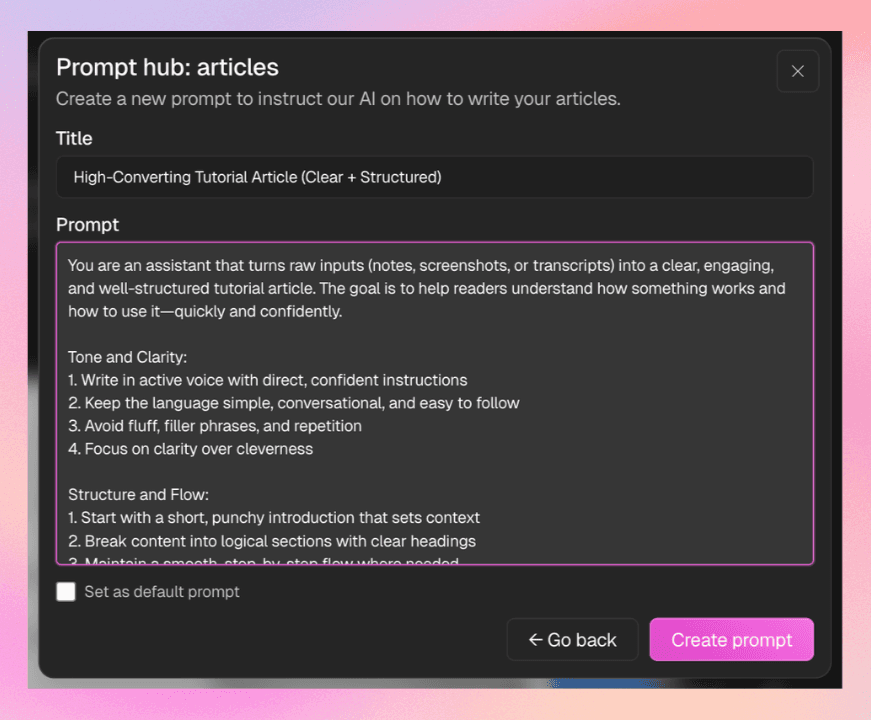
📌 Did you know?
Clueso’s Article Copilot lets you instantly tighten, expand, or rewrite instructions using simple chat-based prompts. Whether you want to make steps more concise, add clarity, or tailor content for a specific audience, you can do it right inside your workflow. You can even create custom prompts to standardize how your documentation is written, ensuring consistency across every guide.
💡 Pro Tip: Don’t try to perfect the draft manually. Use Copilot to iterate quickly. Small prompt tweaks can drastically improve clarity and structure.
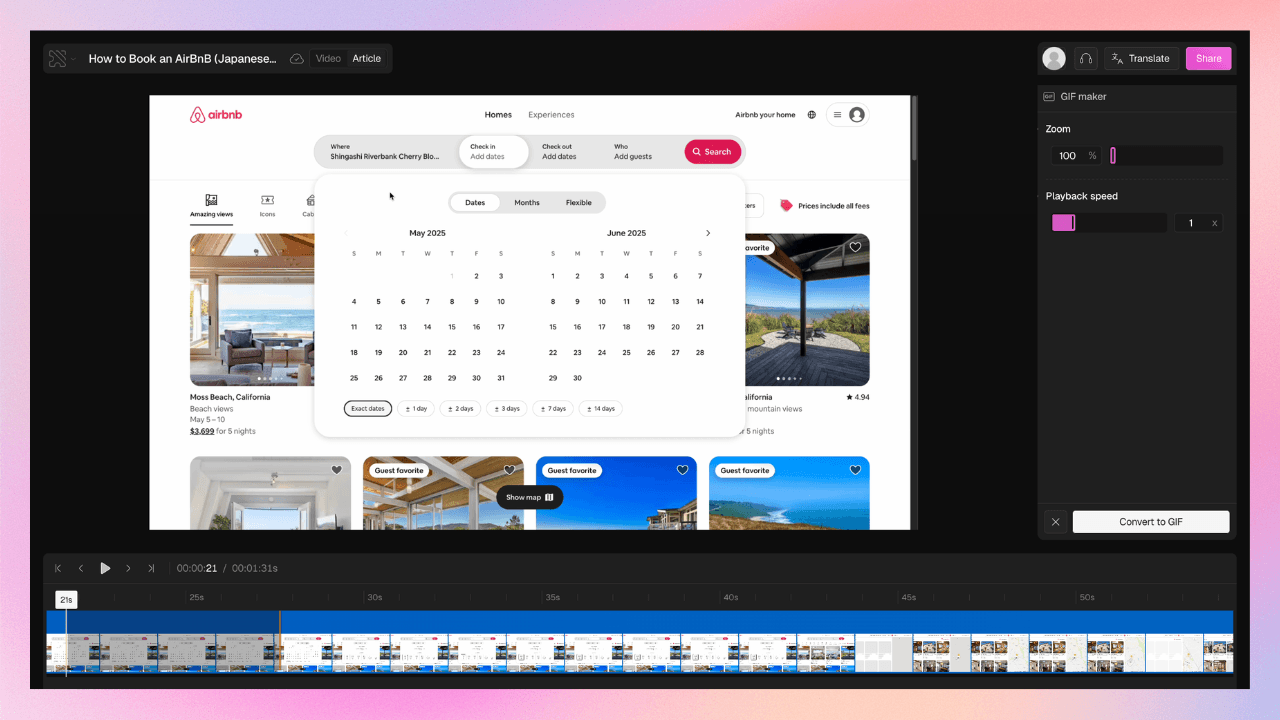
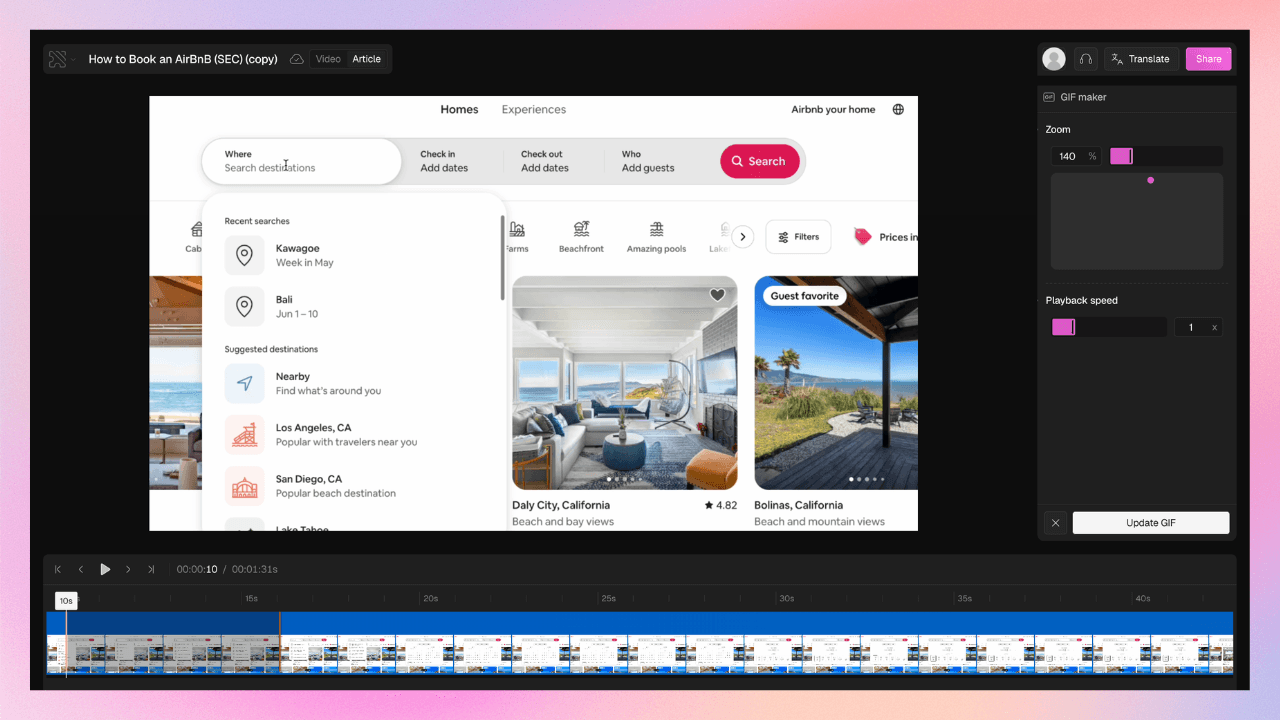
Step 3: Add Screenshots & Visual Context
This is where your guide becomes much easier to follow. Instead of manually taking and inserting screenshots, Clueso automatically pulls relevant screenshots from your recording and maps them to each step.
Each step is paired with a visual that reflects the exact action, often with zoom or focus already applied, so users instantly know where to look. You can still refine visuals when needed. Inside Clueso, you can pick the exact frame, adjust zoom to highlight important areas, or blur sensitive information.
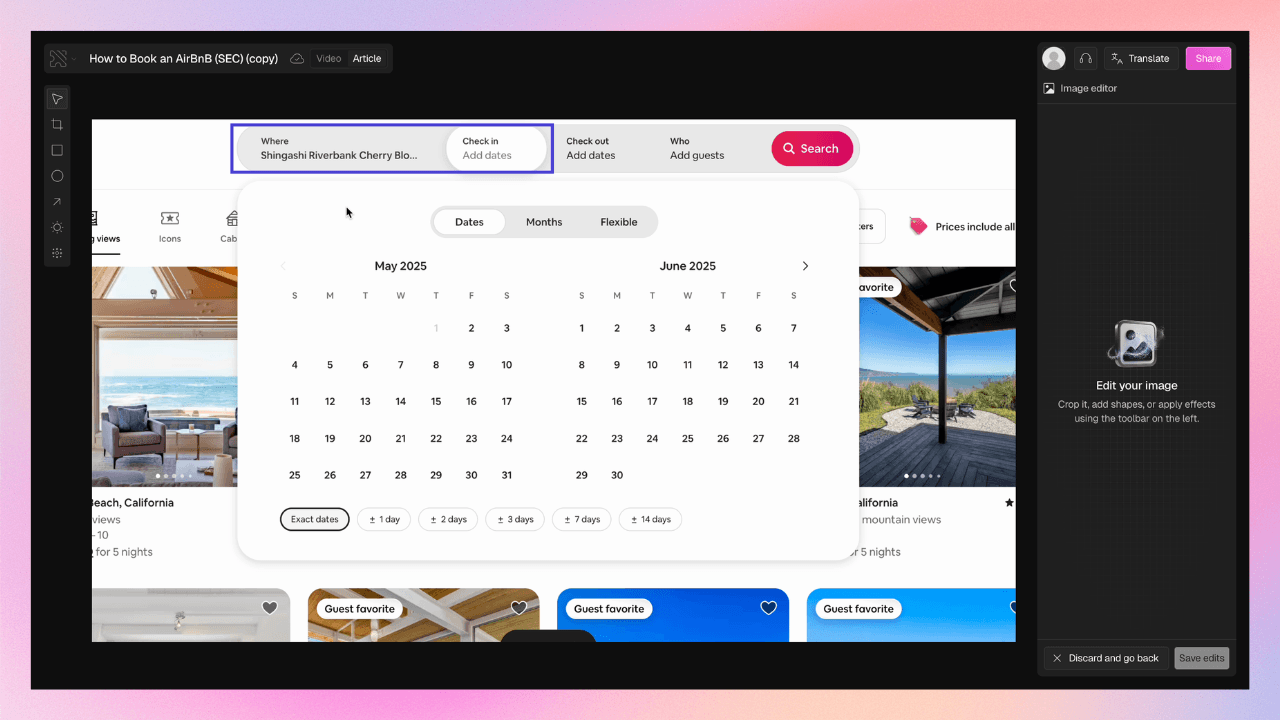
If a static image isn’t enough, you can also turn screenshots into ****GIFs to show motion and interactions more clearly.
💡 Pro Tip: Article Copilot can help edit screenshots too. You can prompt it to blur, highlight, or adjust visuals, and it applies those changes instantly.
Step 4: Add Branding & Formatting
Once your guide is ready, the next step is making it look consistent and professional.
On Clueso, you don’t format each document manually. You drop in your fonts, colors, and logos once and that styling automatically applies across all your documentation. So everything looks cohesive without extra effort.
This is especially useful when you’re creating multiple SOPs or scaling documentation across teams. Instead of spending time on formatting, you get a consistent look by default.
💡 Pro Tip: Set up your branding early. It ensures every new guide is instantly ready to share without needing design tweaks later.
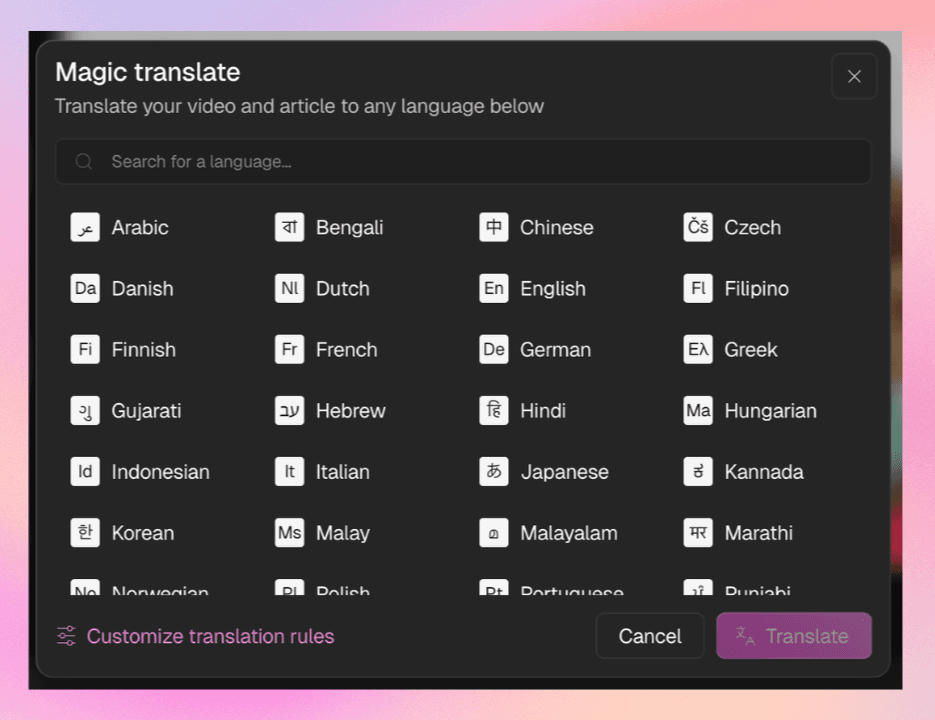
Step 5: Localize & Adapt for Different Audiences
Once your guide is ready, Clueso makes it easy to adapt it for different audiences without rewriting everything from scratch.
You can instantly translate your docs to 60+ languages at the click of a button, making the same guide usable across regions and global teams. This includes both text and visuals, so your documentation stays consistent everywhere.
Beyond translation, you can also adjust how the guide reads depending on who it’s for. For example, you might want a more detailed version for onboarding, a concise version for experienced users, or a more explanatory tone for external customers.
💡 Pro Tip: Use custom prompts to create different “versions” of the same guide (e.g., beginner vs advanced). It helps you quickly adapt the same base content instead of duplicating effort.
Step 6: Review, Collaborate & Finalize
At this stage, your guide is mostly complete. Now it’s about refining it and making sure everything is clear before publishing. Clueso makes it easy to collaborate with your team and review drafts together, so you’re not working in silos or passing documents back and forth.
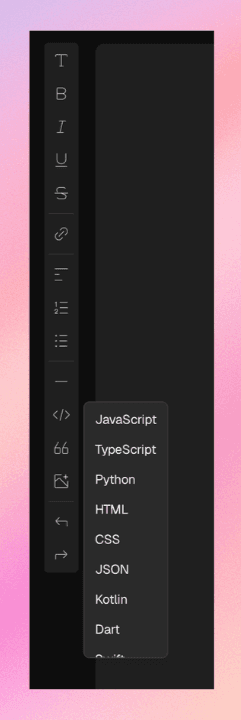
You can also enrich your documentation further by adding code snippets, which is especially useful for API or integration docs. This ensures your guides aren’t just visual and descriptive, but also technically complete where needed.
💡 Pro Tip: Do a quick “first-time user” pass before publishing. If someone unfamiliar can follow the guide without questions, you’re good to go.
Step 7: Publish & Share Your User Guide
Once everything is finalized, your guide is ready to go live.
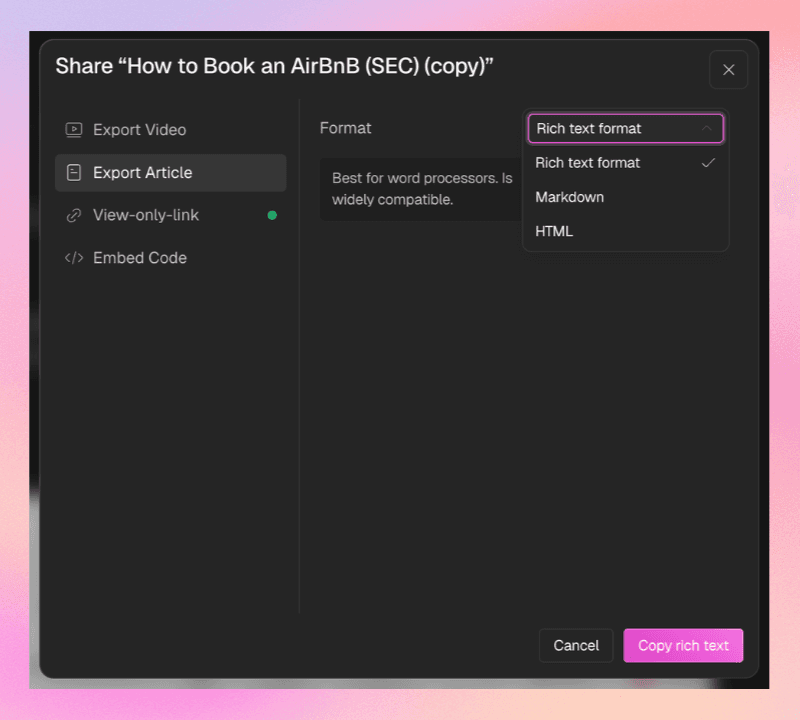
Clueso lets you publish directly to your help center or export your content for universal use, so your documentation isn’t locked into one place. You can share it as a link, embed it into your knowledge base, or integrate it into onboarding and support workflows.
This flexibility means the same guide can power multiple use cases without needing to recreate or reformat anything.
Get Started with Clueso
Start turning workflows into user guides instantly.
Traditional vs AI-Powered User Guide Creation
Now that the workflow is clear, the difference comes down to how you approach documentation. Are you building it step-by-step manually? Or generating it from a captured process?
Here’s how the two approaches stack up for user manual creation:
Aspect | Traditional Documentation Workflow | AI-Powered Documentation Workflow |
|---|---|---|
Starting Point | Open a doc and start writing | Start with a screen recording |
Process | Write → screenshot → format → revise | Capture → auto-extract → generate → refine |
Time Required | Hours per guide | Minutes per guide |
Screenshots | Manually taken, cropped, annotated | Auto-generated from recording |
Writing Effort | Fully manual | Auto-generated, lightly edited |
Consistency | Varies by writer | Standardized across guides |
Updates | Requires rework (text + visuals) | Sync updates without redoing everything |
Scalability | Hard to scale across teams | Easily scalable across teams and use cases |
Use Cases | Static user manuals | Dynamic SOPs, training documentation, user guides |
The biggest shift is how repeatable the process becomes. With traditional methods, every new guide is a fresh effort. With an AI-powered documentation workflow, every new guide follows the same system.
User Guide Creation Tools to Use
To build an efficient documentation workflow, it helps to understand the landscape of tools available today. Most teams rely on a combination of tools across three categories, each solving a different part of the process.
Here’s how different categories of tools compare when it comes to training documentation:
Feature | Clueso | Traditional Documentation Tools | Screen Recording Tools | Knowledge Bases |
|---|---|---|---|---|
Workflow Type | Capture → Generate → Refine | Write → Screenshot → Format | Record → Edit | Write → Organize |
Automation Level | ✓ High (end-to-end automation) | ✗ Manual | ✗ Manual | ✗ Manual |
Creation Speed | Minutes (under 15 mins) | Hours (4–8 hrs per guide) | 1–3 hours (plus writing later) | 2–6 hours |
Starting Point | Screen recording | Blank document | Screen recording | Blank document |
Writing Effort | Minimal (AI-generated) | Fully manual | Not applicable | Fully manual |
Screenshot Handling | ✓ Auto-captured & annotated | Manual capture & editing | Limited/manual | Manual |
Output Format | ✓ Video + Step-by-step guides | Text + images | Video only | Text-heavy docs |
Consistency | ✓ Standardized across guides | Varies by writer | Varies | Template-dependent |
Scalability | ✓ High (repeatable workflow) | Low | Medium | Medium |
Localization | ✓ Auto-translation (multi-language) | Manual | ✗ Not supported | Limited |
Branding | ✓ Auto-applied | Manual formatting | Limited | Template-based |
Best For | End-to-end documentation workflow | Detailed manuals | Demos, walkthroughs | Knowledge storage |
Pre-Publish Checklist for User Guides
Before you hit publish, run through this quick checklist to make sure your user guide, SOP, or training documentation ticks all the boxes.
Clarity & Accuracy
Are the steps clear, specific, and easy to follow?
Does each step describe one action at a time?
Have you removed ambiguity (e.g., “click here” → “click Save in the top-right”)?
Logical Flow
Do steps follow the exact sequence a user would take?
Are there any missing steps or jumps in the process?
Is there a clear start and end to the workflow?
Visual Support
Does every critical step have a screenshot or visual?
Are key UI elements highlighted or easy to spot?
Are visuals aligned correctly with the corresponding steps?
Readability
Is the language simple and jargon-free?
Are sentences short and scannable?
Are headings and step titles easy to skim?
Formatting Consistency
Are fonts, colors, and styles consistent throughout?
Are step numbers, headings, and spacing uniform?
Does the guide follow your brand or documentation standards?
Completeness
Does the guide cover edge cases or common mistakes?
Are tips, warnings, or notes included where needed?
Can a new user complete the task without external help?
Accessibility
Is the guide usable across devices (desktop/mobile)?
Are visuals clear and not overly cluttered?
Is the content readable for different user types (internal vs external)?
If you can check all of the above, your user guide creation workflow has done its job and your documentation is ready to scale.
Documentation Shouldn’t Be a Bottleneck
Most teams don’t struggle with what to document; they struggle with how long it takes to document it. And that’s the real problem.
When user guide creation feels slow and manual, documentation gets delayed, skipped, or rushed. SOPs go outdated. Training docs become inconsistent. Knowledge stays trapped in people instead of systems.
That’s a workflow problem. The shift to Clueso’s capture-first documentation workflows solves this at the root.
If you want documentation that scales with your team, the answer isn’t writing faster. It’s stopping the need to write from scratch altogether.
Frequently Asked Questions About User Guide Creation
1. How do I create a user manual without writing from scratch?
Start by recording your screen while performing the task. Then use an AI-powered documentation tool to automatically extract steps, generate written instructions, and add screenshots. Instead of manually writing everything, you simply review and refine the auto-generated draft. This capture-first approach eliminates the need to build user manuals from scratch.
2. What are the essential steps to generate a user guide?
The essential steps to generate a user guide are capturing the process, extracting steps, documenting instructions, add visuals, and doing a final layer of refinement before publishing.
3. What is the difference between SOPs and user guides?
SOPs (Standard Operating Procedures) are designed for internal teams and focus on maintaining consistency in processes. They often include rules, standards, and compliance details.
User guides, on the other hand, are typically end-user focused, helping customers or users complete specific tasks within a product or system.
In short, SOPs standardize how teams work; user guides explain how to use something.
4. What are the common mistakes in creating user manuals?
The most common mistakes in creating user manuals include:
Writing vague or unclear steps
Skipping steps or assuming prior knowledge
Overloading guides with too much text
Not including visuals or screenshots
Inconsistent formatting and structure
Failing to update documentation when processes change

Co-founder & CBO
Neel is the co-founder at Clueso and handles all things GTM, from marketing to sales to customer success. A Y Combinator W23 alum and IIT Madras graduate, Neel embraced entrepreneurship as an early-career choice. Drawing on his experience building Clueso, he shares advice on building products people want and nurturing strong customer relationships.
